Updated: May 2026
Raja Ampat Photo Tour — The Ultimate Guide to Underwater Photo…
Raja Ampat Photo Tour is a curated Indonesia luxury tourism experience offered by Rajaampat Phototour Co.: handpicked routes, vetted operators, transparent pricing, and 24/7 concierge support across Indonesia.
- What makes Raja Ampat Photo Tour a premium experience.
- How Rajaampat Phototour Co. curates exclusive access and concierge logistics.
- Routes, seasons, and pricing transparency — no hidden fees.
The Ultimate Guide to Underwater Photography in Raja Ampat
At the heart of the Coral Triangle lies an archipelago of such staggering biodiversity that it defies easy description. Raja Ampat is the global epicentre of marine life, a living library of evolution’s finest work. For the underwater photographer, this is not merely a destination; it is a pilgrimage. This guide is curated for those who seek to capture its essence, offering the insights needed to transform a visit into a portfolio-defining expedition on a world-class Raja Ampat photo tour.
Why Raja Ampat is a Mecca for Underwater Photographers
To understand Raja Ampat’s photographic appeal is to understand its ecological significance. Situated in Indonesia’s West Papua province, these islands harbour more recorded fish and coral species than anywhere else on Earth. The sheer density of life is overwhelming. A single dive site, such as Cape Kri in the Dampier Strait, can reveal hundreds of fish species, a spectacle of perpetual motion and colour that challenges even the widest of lenses. The water is a nutrient-rich soup, feeding everything from the smallest pygmy seahorse to the majestic oceanic manta ray.
The underwater topography is as varied as the life it supports. In the south, the dramatic limestone karsts of Misool plunge into the sea, creating steep walls adorned with vibrant soft corals and enormous sea fans. To the north, the Dampier Strait offers sloping reefs, seamounts, and world-famous cleaning stations. There are serene mangrove forests where the roots meet the reef, murky muck-diving sites hiding rare critters, and crystal-clear blue-water channels. This diversity provides an endless canvas for both wide-angle and macro disciplines, ensuring that every dive presents a new creative problem to solve.
Beyond the raw numbers, it is the health of the ecosystem that sets it apart. The reefs are resilient and kaleidoscopic, a testament to successful conservation efforts. This pristine environment, combined with generally excellent visibility, creates ideal conditions for coral triangle photography. It allows for clean, vibrant images where the full spectrum of colour can be captured with carefully positioned strobes, making it a true paradise for the discerning image-maker.
Essential Gear for Your Raja Ampat Photo Tour
Arriving in a location as remote and spectacular as Raja Ampat with the wrong equipment is a photographer’s nightmare. Preparation is paramount. Your camera system—whether a professional-grade DSLR or a high-performance mirrorless body—is the core, but its underwater housing is what makes it functional. Choose a reputable aluminium housing from brands like Nauticam or Seacam for its durability, ergonomic access to controls, and reliability at depth.
Lens selection will define your photographic possibilities. For capturing the grand scale of the reefs, schooling fish, and pelagics, a high-quality fisheye lens (like a Tokina 10-17mm or Canon 8-15mm) or a rectilinear wide-angle zoom is essential. These allow for close-focus wide-angle techniques, bringing the viewer into the scene. For the miniature world, a dedicated macro lens in the 90-105mm range is the workhorse, perfect for isolating subjects like nudibranchs and crustaceans. A 60mm macro can also be useful for slightly larger subjects or fish portraiture.
Lighting is the most critical element of underwater photography. Natural light falls off rapidly beneath the surface, and artificial light is necessary to restore the vibrant reds, oranges, and yellows of the reef. A dual strobe setup is non-negotiable for serious work, providing the power and flexibility to light wide scenes evenly and control shadows. Brands like Inon and Sea&Sea are industry standards. Pair them with sturdy arms for precise positioning. Finally, pack spares of everything: batteries, chargers, O-rings, and memory cards. A well-organised Raja Ampat photo tour will provide a dedicated camera room, but self-sufficiency is key.
Mastering Wide-Angle Underwater Photography in Raja Ampat
Raja Ampat’s signature scenes are tailor-made for wide-angle photography. The sprawling coral gardens of Melissa’s Garden in the Fam Islands, the dense fish vortex at Cape Kri, or the iconic swim-throughs of Boo Windows in Misool all demand a lens that can capture their immense scale. The primary technique to master here is close-focus wide-angle (CFWA). This involves positioning your camera very close to a compelling foreground subject—a vibrant sea fan, a barrel sponge, or a colourful anemone—while retaining the grand vista of the reef and blue water in the background. This creates images with depth, drama, and a strong sense of place.
Controlling your lighting is crucial. To avoid illuminating the water column between your lens and the subject, which creates backscatter, position your strobes wide and slightly behind the handles of your housing. Aim them outwards to feather the light onto the edges of the scene. This technique illuminates the foreground without creating a distracting blizzard of lit particles. Pay attention to the sun. Shooting into the sun can create beautiful sunballs and dramatic silhouettes, particularly in the shallow, clear waters around the jetties of villages like Arborek.
Compositionally, look for leading lines within the reef structure to guide the viewer’s eye. Use the negative space of the blue water to frame your subjects and create a sense of scale. A diver in the background can add a human element and enhance this sense of immensity. Patience is often rewarded; waiting for a school of fusiliers to part or a turtle to glide into the frame can elevate a good shot into a great one.
The Art of Macro: Capturing Raja Ampat’s Small Wonders
While the wide-angle scenes are breathtaking, Raja Ampat’s reputation among macro aficionados is legendary. This is the kingdom of the small, the strange, and the spectacular. The challenge is not finding subjects, but deciding which of the countless critters to focus on. This is where the expertise of a local dive guide, a key component of any reputable Raja Ampat photo tour, becomes invaluable. They possess the trained eyes to spot a perfectly camouflaged wobbegong shark under a ledge or a tiny pygmy seahorse clinging to its host gorgonian fan.
Successful macro photography tips start with impeccable buoyancy. You must be perfectly still, able to hover without touching the delicate reef. When you find your subject, whether it’s a flamboyant cuttlefish or a rare nudibranch, take time to observe its behaviour. Your goal is to capture a portrait that reveals its character. Focus on the eyes. Use a small aperture (f/11 to f/22) to ensure adequate depth of field, keeping the critical parts of the tiny animal sharp.
Creative lighting transforms macro images. While standard front-lighting works, experimenting with strobe lighting techniques can yield more artistic results. Position one strobe from the side or slightly behind the subject to create texture and dimension. Use a snoot—a cone that narrows the beam of light—to isolate your subject against a dramatic black background. This is particularly effective for subjects like the skeleton shrimp or a hairy squat lobster, turning a simple documentation shot into a piece of art.
Advanced Techniques: Lighting, Composition, and Post-Processing
To move beyond documentary images and create truly compelling underwater art, a photographer must master advanced concepts. Lighting is not just about exposure; it is about mood. Backlighting a translucent subject, like a jellyfish or a soft coral polyp, can make it glow. Inward lighting, where strobes are turned back towards the camera housing, can create a soft, even light for reflective subjects like schooling jacks, minimising harsh hotspots.
Compositionally, think beyond the rule of thirds. Look for S-curves in whip corals, repeating patterns in coral polyps, and frame-within-a-frame opportunities using swim-throughs or overhangs. In a place as visually dense as Raja Ampat, the art of exclusion is as important as inclusion. Simplify your background to make your primary subject stand out. The best dive conditions, with calm water and good visibility, provide the ideal canvas for these thoughtful compositions.
Your work is not finished when you surface. Shooting in RAW format is essential, as it captures the maximum amount of data, giving you far greater latitude in post-processing. In software like Adobe Lightroom, the first steps are always correcting white balance and exposure. From there, you can selectively adjust colours to bring back the vibrancy lost at depth, manage contrast, and carefully remove any lingering backscatter. A subtle, professional edit enhances the natural beauty of the scene, it does not create an artificial one.
Navigating Raja Ampat: Best Dive Sites and Conditions for Photography
A successful photographic expedition in Raja Ampat depends on a well-planned itinerary that targets the right sites at the right time. The region is vast, and a liveaboard is the most effective way to access its diverse ecosystems. The best dive conditions are typically found between October and April, when the seas are calmer and the weather more predictable, though diving is excellent year-round.
Key Photographic Hotspots
- Misool (South): Known for its breathtaking soft corals and dramatic topography. Sites like Magic Mountain are cleaning stations for both oceanic and reef mantas, offering incredible wide-angle opportunities. Boo Windows and Fiabacet are must-dives for vibrant reefscapes.
- Dampier Strait (Central): This is the epicentre of biodiversity. Cape Kri holds a world record for fish species on a single dive. Blue Magic is a submerged seamount attracting large pelagics, while Manta Sandy is a reliable spot for watching manta rays being cleaned. Arborek Jetty is a photographer’s playground in the late afternoon.
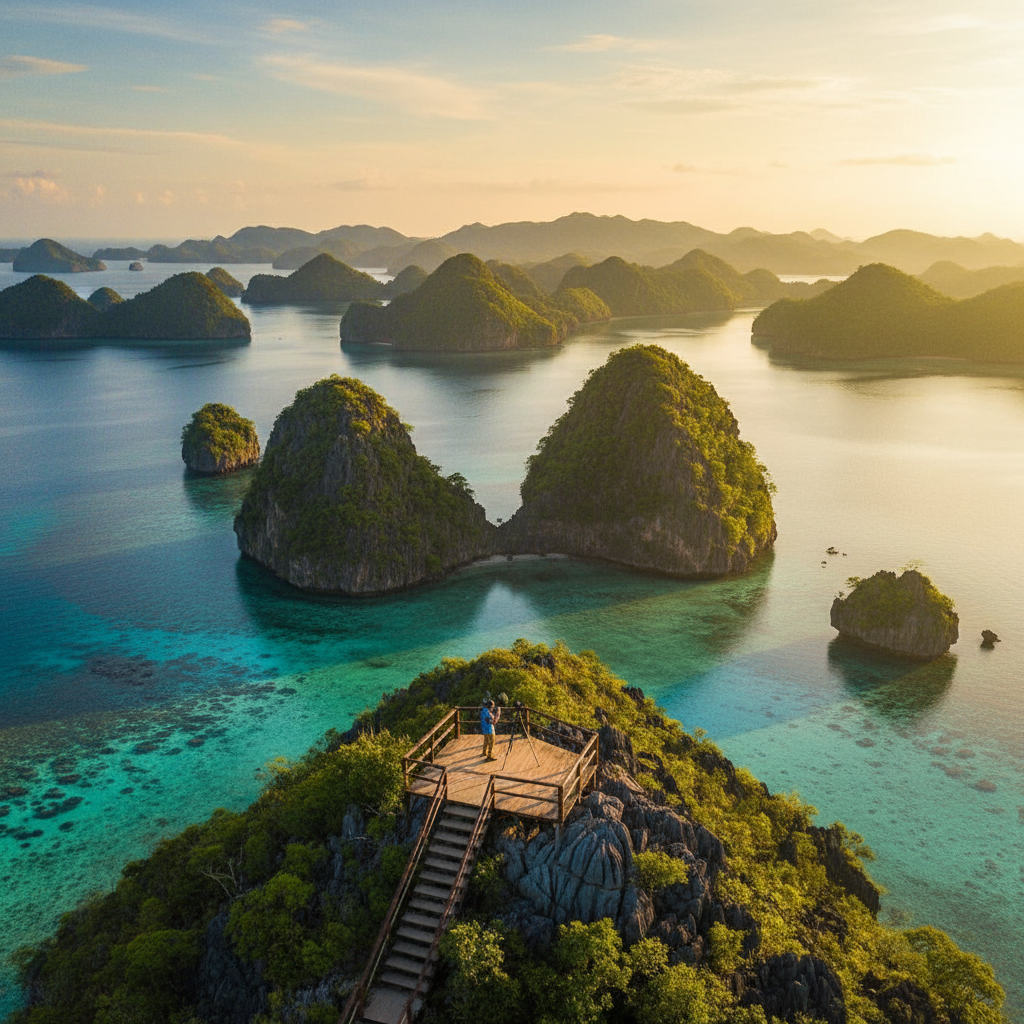
- Fam Islands / Pianemo (Central): Melissa’s Garden is arguably one of the most beautiful and healthy hard coral reefs on the planet, a dream for wide-angle photographers. The iconic Pianemo viewpoint offers a stunning landscape photography opportunity between dives.
- Kabui Bay: This unique area features hidden passages and limestone islets undercut by the sea. The ‘blue water mangroves’ here offer a surreal environment where coral grows directly on mangrove roots, creating a one-of-a-kind photographic subject.
Choosing the Right Raja Ampat Photo Tour
Not all trips to Raja Ampat are created equal, especially for photographers. A standard dive liveaboard is designed to maximise bottom time for as many divers as possible. A dedicated Raja Ampat photo tour, in contrast, is structured entirely around the pursuit of exceptional images. The difference is profound.
The itinerary is dictated by the light and tides, not a rigid schedule. Dives are planned for early morning or late afternoon to capture the best light. Group sizes are kept small to avoid crowding a subject and kicking up silt. Critically, the expedition is led by a professional photographer who provides in-water guidance, daily workshops, and post-processing sessions. They understand the specific needs of photographers, from managing complex camera rigs to finding elusive subjects.
When vetting an operator, look for evidence of this specialisation. Does the vessel have a proper, climate-controlled camera room with ample charging stations? Are the guides specifically trained in spotting macro life and assisting photographers? At Raja Ampat Photo Tour, our expeditions are curated and led by seasoned professionals who have spent years mastering these waters. We prioritise thoughtful, low-impact encounters that yield portfolio-quality results, ensuring your investment in time and travel is rewarded with extraordinary images.
FAQ: Your Underwater Photography Questions Answered
What is the best time of year for underwater photography in Raja Ampat?
The prime season for the best dive conditions runs from October to April. During these months, the seas are generally calmer and rainfall is lower, leading to better visibility and more comfortable surface intervals. However, Raja Ampat is a year-round destination, and the shoulder months can offer fewer crowds with still-excellent photographic opportunities. The marine life is abundant throughout the year, so a trip anytime will be rewarding.
Do I really need two strobes for my camera setup?
For wide-angle photography, two strobes are essential. A single strobe will create harsh shadows and cannot evenly illuminate the large, colourful reef scenes that make Raja Ampat famous. For macro, you can certainly achieve good results with one strobe, but a second one provides far more creative control over lighting direction, allowing you to eliminate shadows, create backlighting effects, and model your subject with more precision.
What are the biggest challenges for photographers in Raja Ampat?
The primary challenges are managing the strong currents present at some of the top dive sites and the sheer visual density. Currents require excellent buoyancy control and situational awareness. The abundance of life can be overwhelming; the key is to focus on a single subject or composition rather than trying to capture everything at once. A good guide can help you anticipate conditions and find manageable subjects.
Is a liveaboard better than a resort for a photo trip?
For a dedicated photographer, a liveaboard is almost always the superior choice. It provides access to the most remote and pristine dive sites across the vast archipelago, from Misool in the south to the Dampier Strait in the north. A resort limits you to a smaller local area. A liveaboard-based Raja Ampat photo tour is an immersive experience designed to maximise photographic opportunities across the region’s diverse habitats.
What camera settings are a good starting point for wide-angle?
A solid starting point for wide-angle with strobes is ISO 100-200, an aperture of f/8-f/11, and a shutter speed of 1/125s. The shutter speed controls the ambient light (the blue background), while the aperture and strobe power control the exposure on your foreground subject. Adjust your shutter speed to make the background darker or brighter, and then adjust your aperture or strobes for the foreground.
How do you find tiny subjects like a pygmy seahorse?
Finding a pygmy seahorse, which can be smaller than a grain of rice, requires a highly trained eye. They live exclusively on specific species of Muricella gorgonian sea fans. The key is to rely on an experienced local dive guide. They know which fans are likely hosts and can gently scan them without touching. Photographers should never touch the fan themselves, as it can damage both the fan and its delicate inhabitants.
Should I use a diopter for macro photography in Raja Ampat?
A wet-mate diopter (or close-up lens) is an excellent tool to bring. While your 100mm or 105mm macro lens is perfect for most subjects, a diopter allows you to achieve super-macro magnification for extremely small critters like skeleton shrimp or the details of a nudibranch’s rhinophore. It gives you the flexibility to shoot subjects that would otherwise be too small to fill the frame, expanding your creative potential.
What is the water temperature and what exposure suit should I wear?
The water temperature in Raja Ampat is consistently warm, typically ranging from 28-30°C (82-86°F) year-round. Most divers are comfortable in a 3mm full-length wetsuit. Given that photography dives often involve moving slowly and staying stationary for extended periods, some individuals who get cold easily might prefer a 5mm suit or a hooded vest for added warmth over multiple dives per day.
Are there specific ethical guidelines for photographers here?
Absolutely. Responsible interaction is paramount. Never touch, move, or harass marine life for a better shot. Maintain perfect buoyancy to avoid damaging the fragile coral. Do not use a reef stick or pointer to prod creatures. A professionally guided Raja Ampat photo tour will always brief on and enforce these low-impact practices to ensure the ecosystem remains pristine for generations to come.
Can I shoot both wide-angle and macro on the same dive?
While technically possible with certain lens setups (like a wide-angle lens with a wet-mate macro converter), it is generally impractical and leads to compromised results for both. It is far more effective to dedicate each dive to either wide-angle or macro. This allows you to fine-tune your mindset, lighting, and technique for one specific discipline, leading to a much higher success rate and better quality images.
Plan Your Definitive Photographic Expedition
Capturing the unparalleled beauty of Raja Ampat requires more than just a ticket and a camera. It demands expert planning, local knowledge, and an itinerary built around the rhythm of the light and the sea. Our dedicated expeditions are designed by photographers, for photographers, ensuring every detail is aligned with your creative goals. To review a detailed itinerary or to discuss your specific photographic objectives with our team, please send an enquiry to bd@juaraholding.com or connect with us via WhatsApp on +62 811-3941-4563.